
How to collect a Rubik's Cube. The easiest circuit
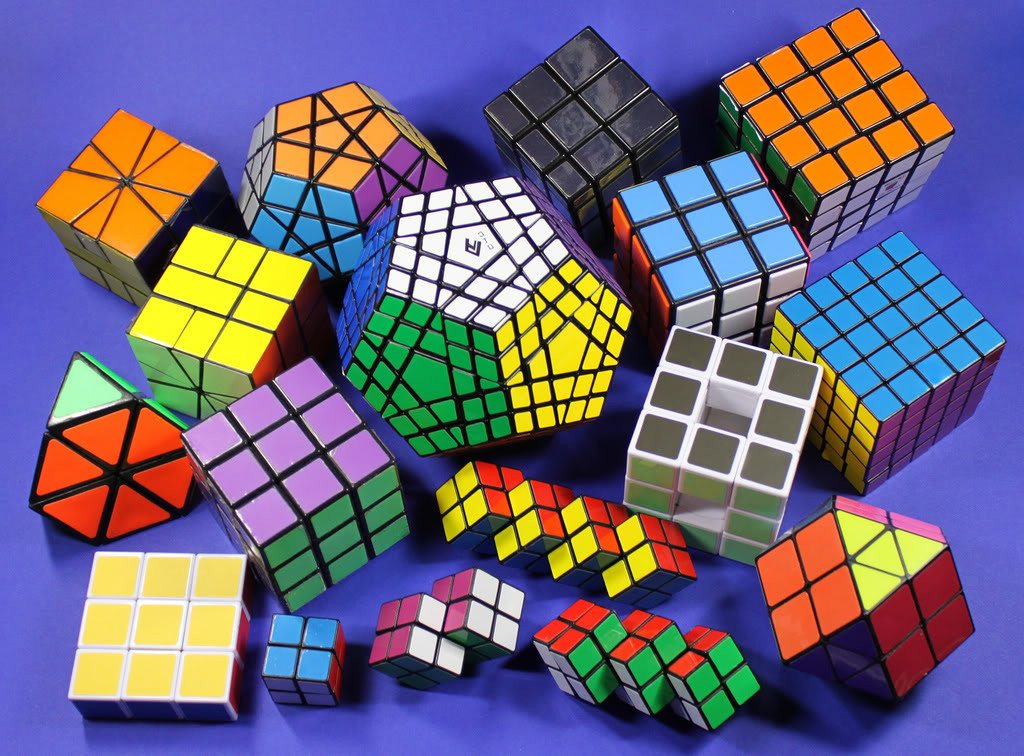
The Rubik's Cube is today recognized as one of the most popular puzzles in the world, consisting of multi-colored sectors connected in one shape. Its creator was the Hungarian sculptor, who made a visual aid on group theory for his students. Today, this toy is the best-selling in the world.
Cube structure
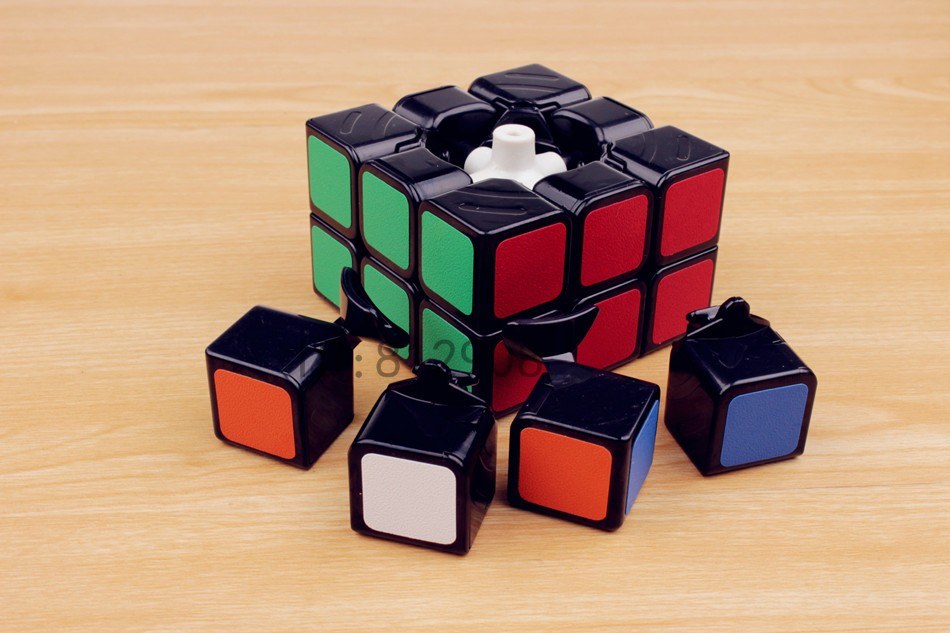
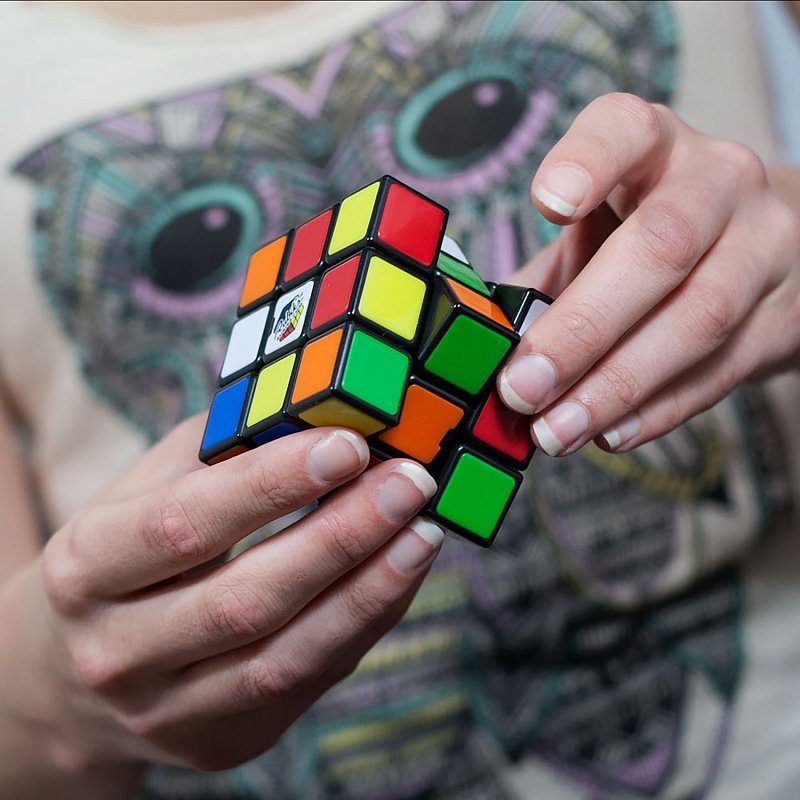
Before you understand how to assemble this cube, you need to understand its structure. Today you can find a variety of shapes and sizes of the puzzle. The standard Rubik's Cube consists of 12 edges and has 8 angles. Inside there is a cross on which all details are attached.
The end of the cross is one of the squares around which other squares with the same color are going. A puzzle is considered to be assembled if there is one color on each of the 6 sides of the cube.
In the original cube, the yellow color in any case will be located directly opposite the white. And if for some reason the cube is taken apart and then folded incorrectly, then it will be impossible to assemble the puzzle.
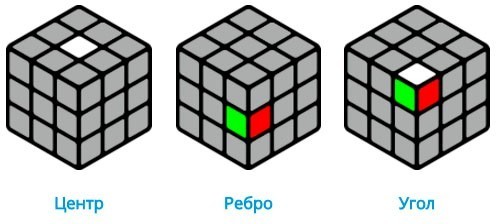
In addition to the center of the figure, its constant components are angles, each of which has 3 colors. No matter how you change the position of the colors in the figure, the color of the corners will remain the same. To collect the puzzle, the middle and corner sectors move based on the color that is installed on the central sector.
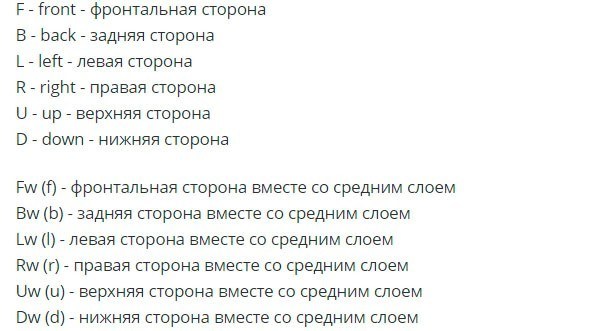
Each side of the cube has its own name.
When assembling a puzzle, it is necessary not only to move its sides, but also to change the spatial position of the cube. Such movements are called interception. Schematically, this can be shown as follows.

On the Internet you can find a lot of puzzle assembly algorithms. If only the letter is indicated in it, then the position of the side must be carried out clockwise. And the apostrophe sign (‘) near the letter indicates that it should be rotated counterclockwise. The number 2 after the letter means that the side should be rotated twice. For example, D2 ’indicates that the bottom side of the cube should be rotated twice counterclockwise.

Instructions for beginners
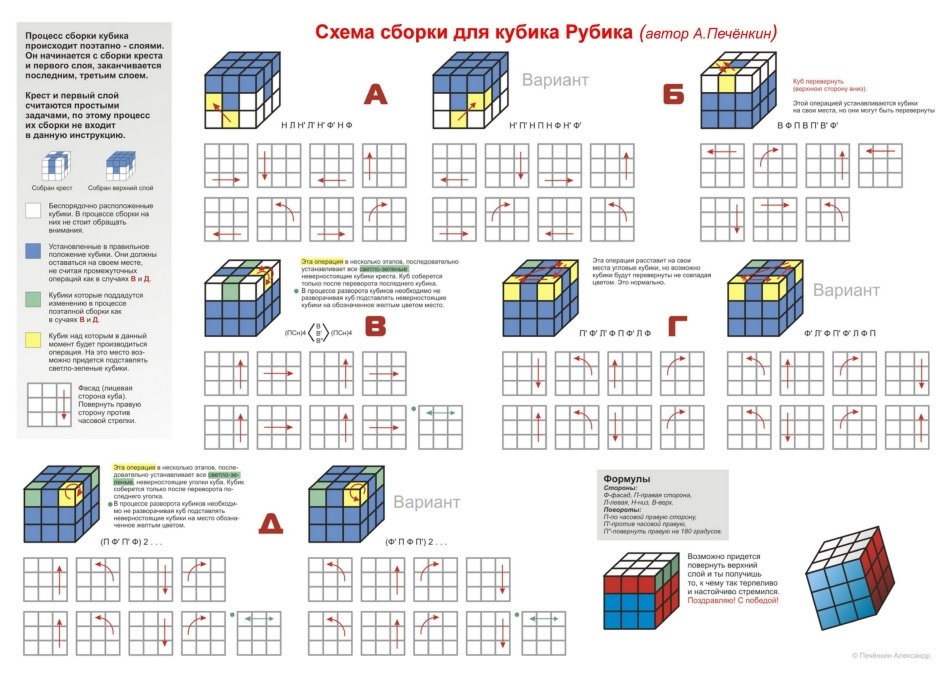
The easiest way to add a Rubik's Cube is as follows:
- Start collecting the cube with the correct cross. This means that on each side you will have a center and edges of the same color.
- To do this, find the white center and ribs, and then collect the cross, following the instructions in the picture.

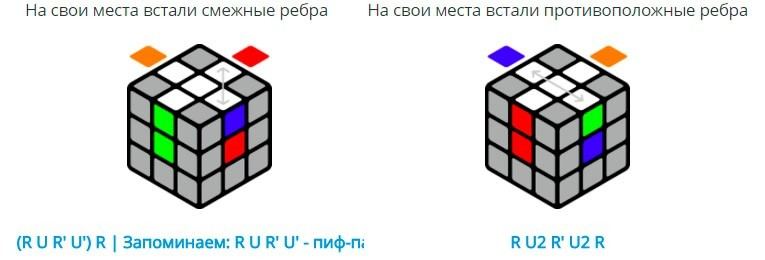
- If everything is done correctly, then on one side you can see the cross. At first, the cross will be wrong and should be redone a little. To do this, swap the ribs.
- This algorithm is called “bang-bang”.
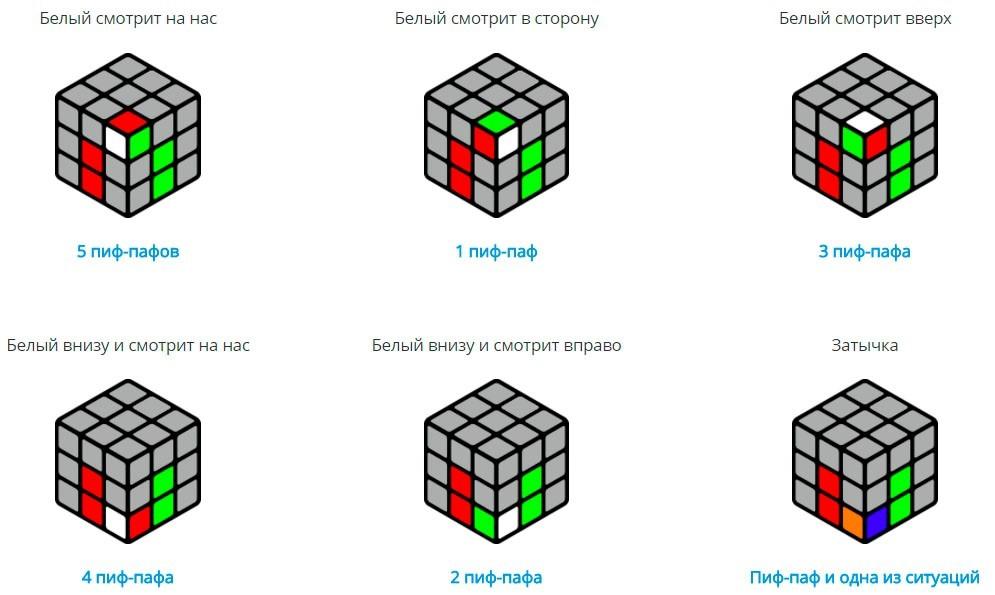
- At the next stage, you need to find the white corner from the bottom and place a red corner above it. You can get this result in several ways, which are selected based on the initial location of the white and red corners.
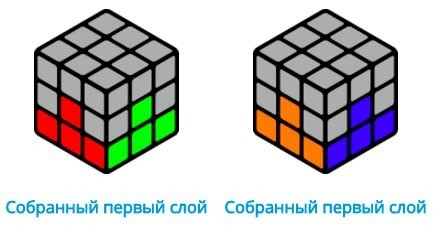
- Thus, we get this kind of cube.
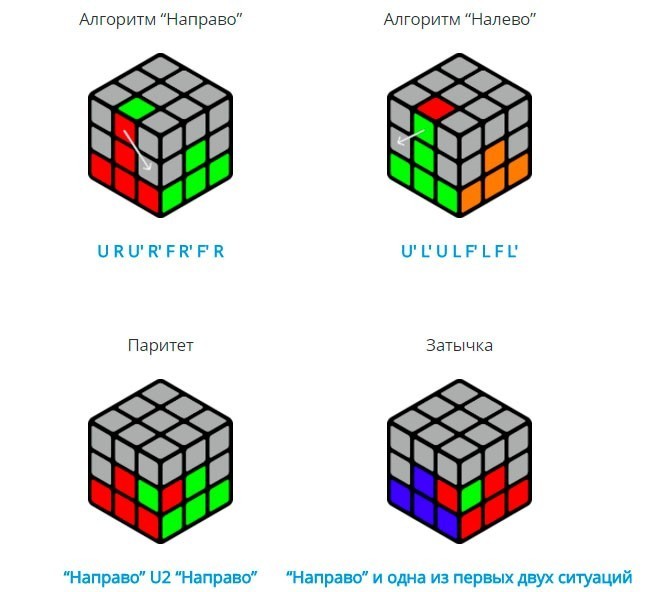
- Now you can start the second layer. At this stage, you have to find four edges where there is no yellow color and place them in the middle of the second layer. The cube must be twisted until the color of the center and faces is the same. You can use one of the options for this.
- The next step is going to a yellow cross. In some cases, it can turn out on its own without your additional participation, but this happens quite rarely. Basically, it can be located in one of the following images.
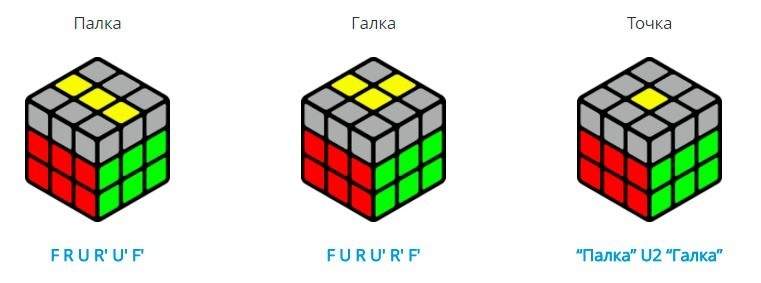
- After the yellow cross is assembled, you need to use one of the options below.
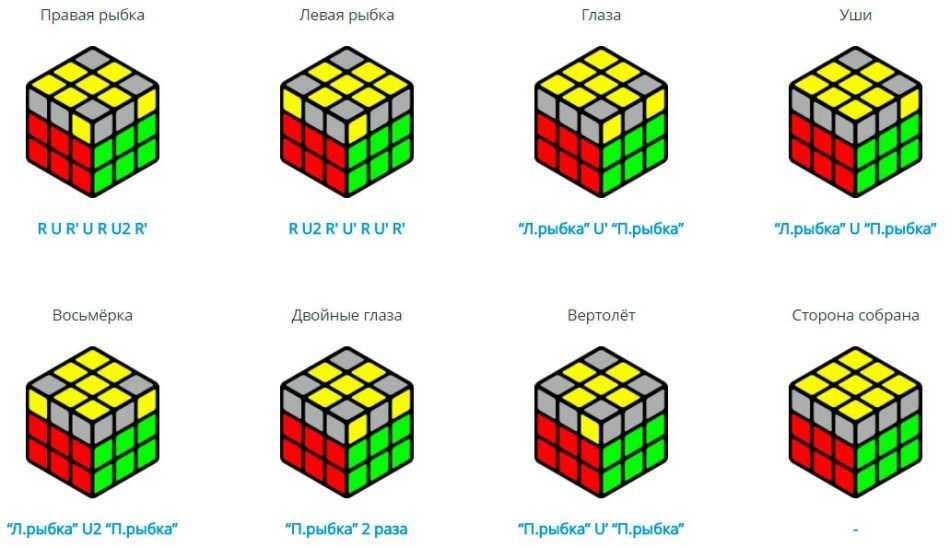
- Next, the corners on the top layer are collected. To do this, one of the angles is set by one of the movements: U, U ’and U2.It is important that the colors of the angle on all layers are the same. At this stage, you need to keep the cube with the white side towards you.
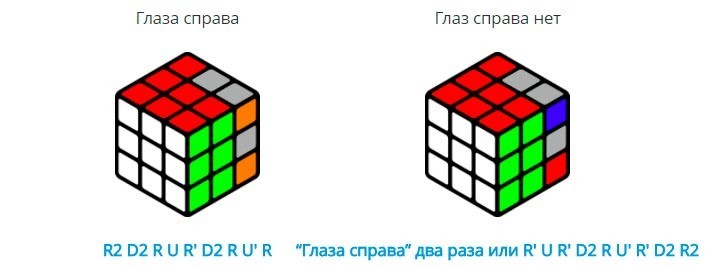
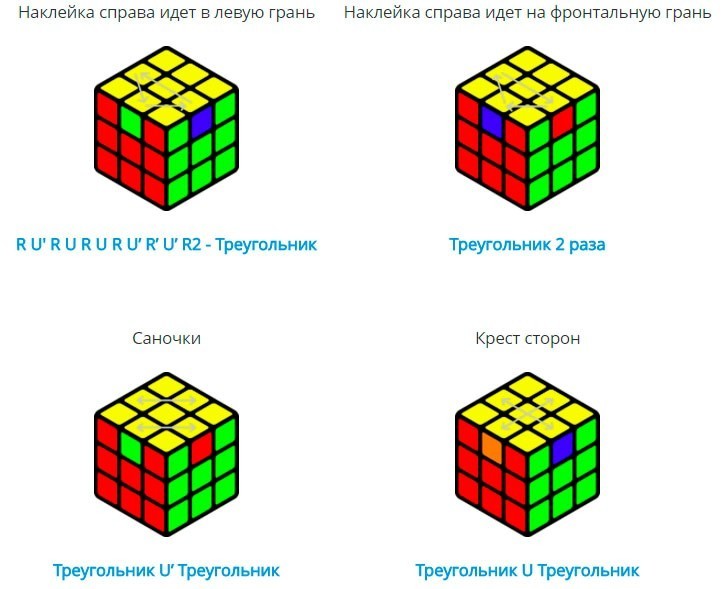
- At the final stage, ribs on the upper layer are collected. If everything was done correctly, then 4 options are possible, which are solved as follows.
Jessica Friedrich Method
This technique is based on the speed at which the puzzle is assembled. But this option is not suitable for those who for the first time in their lives picked up a cube.
- First, a cross is going to face the sides. This stage is called “Cross”.
- Next, two layers of the “F2L” cube are assembled simultaneously. Then one of these algorithms is applied.
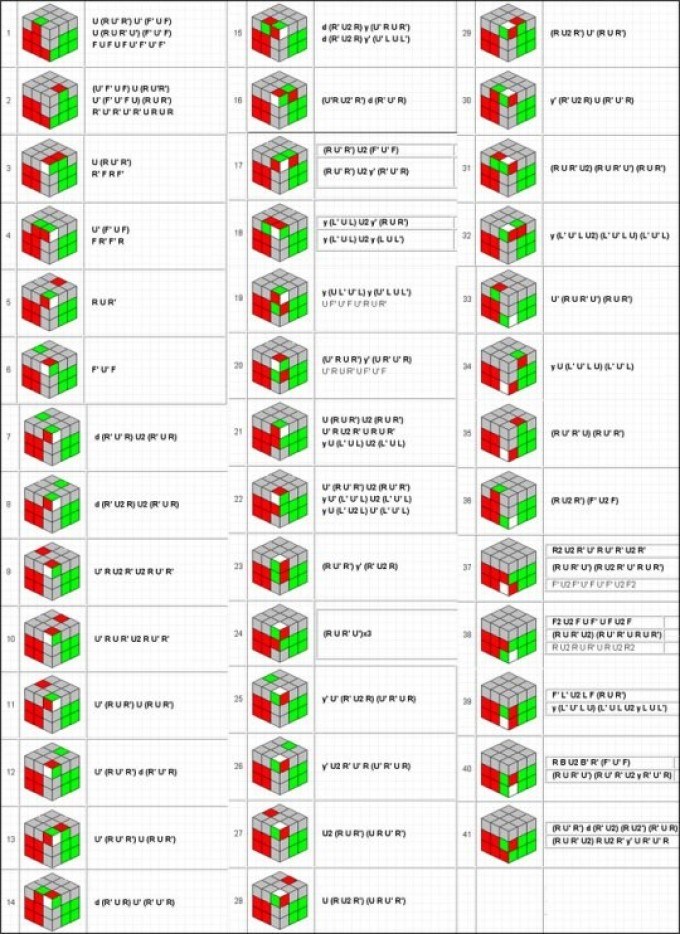
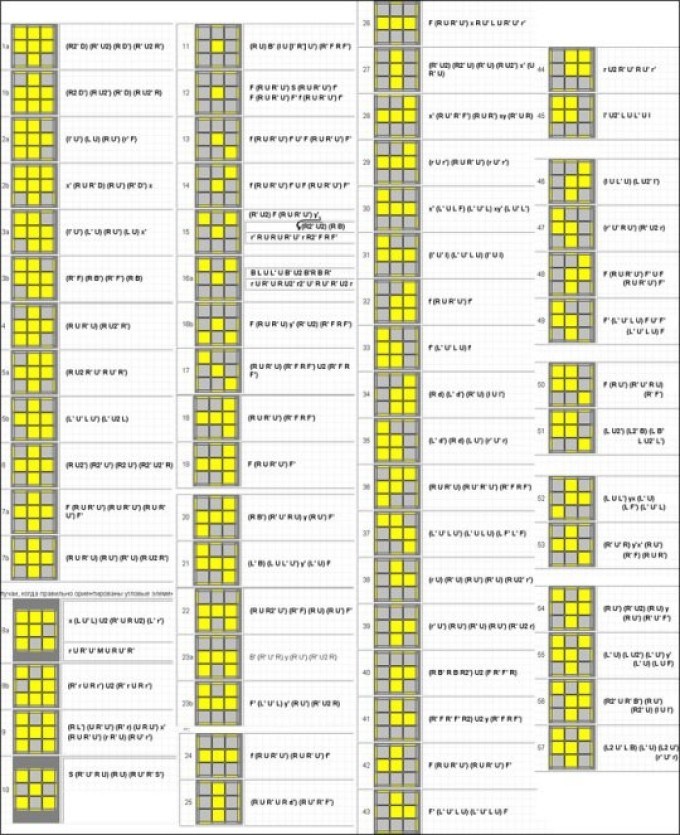
- After that, the top layer is completely collected. This stage will be called OLL and consists of such algorithms.
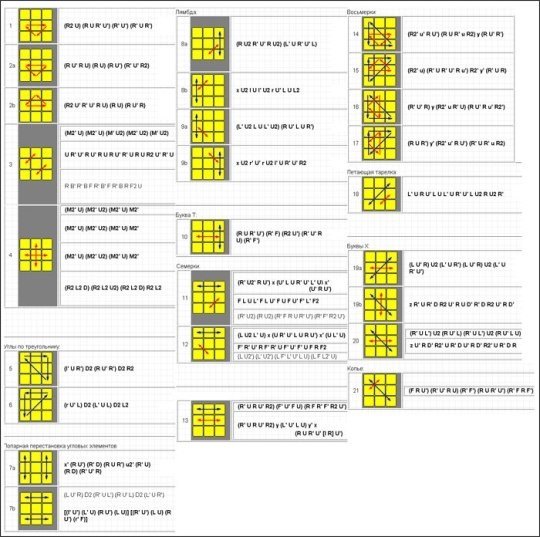
- The last stage is called PLL. Such algorithms are used for it.
How to collect a cube in 20 moves
In 1982, the first competition was held for the speed of assembly of this puzzle. After that, many began to independently develop various algorithms that could quickly assemble a cube using a minimum number of actions.
An algorithm consisting of a minimum number of moves is recognized as the so-called “God Algorithm”, which is performed in 20 moves.
Puzzle Build Secrets
If you set a goal to learn how to quickly build a Rubik's cube, then you need to remember a few secrets:
- It is best to start assembling the puzzle by choosing yellow or white colors as the basis.
- The technique for assembling the puzzle suggests that this should take a minimum amount of time. After all, even a millisecond can allow you to set a new record. That is why most often the assembly begins with a cross along the bottom.
- The best result will always be one who can calculate his actions 1 step ahead.
- It is important that all parts of the cube rotate well. To improve it in inexpensive puzzle models, you can use special grease.
The Rubik's Cube is a rather tricky puzzle that can interest not only an adult, but also a child. Champions in the speed of its assembly are most often teenagers. The last record belongs to 15-year-old Colin Burns, who was able to fully assemble the cube in 5.2 seconds.


To answer
Want to join the discussion?Feel free to contribute!