
Postcards for the New Year 2018: ideas and workshops
The tradition of giving cards for the holidays remains relevant for many years in a row. Moreover, now there are really amazing options made by needlewomen with special warmth. Therefore, if you want to try to make a postcard with your own hands, read on. After all, we have prepared for you several workshops of different complexity.


Greeting card with Santa Claus

For work, we will prepare the following materials:
- thick red and cream paper;
- flat wooden Christmas tree toy;
- paper for scrapbooking with New Year's pattern;
- twine;
- napkins with New Year's pattern;
- scissors;
- two types of lace ribbon;
- red satin ribbon;
- decorative pendants;
- a piece of burlap, canvas;
- pencil;
- ruler;
- compass;
- glue gun;
- glue.

A sheet of beige paper is folded in half to create the foundation. 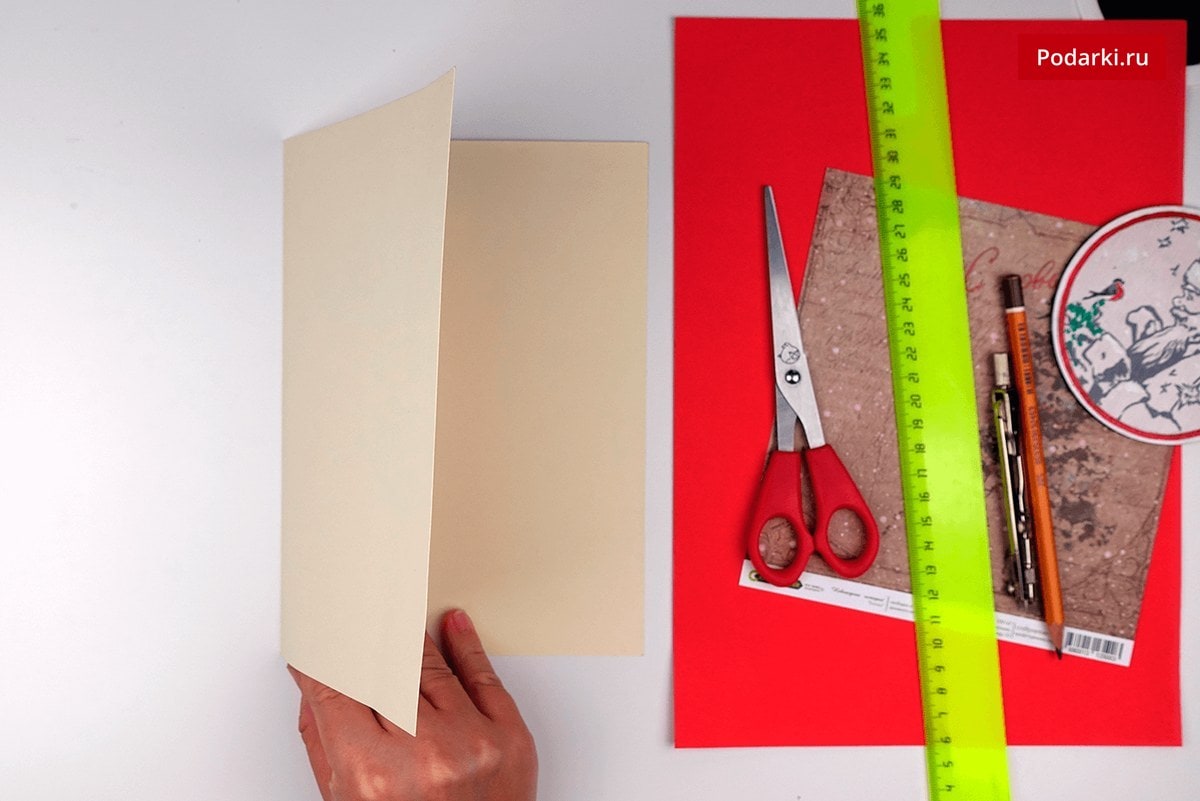 We begin to create a substrate. To do this, take red paper and draw a rectangle on it. In width, it should coincide with the base, and in height should be slightly smaller.

On the left side, draw a part of the circumference of a flat Christmas tree toy to the rectangle. For convenience, you can use the compass. 

Cut the blank in red. We slightly shift it to the left side and apply paper with a New Year's drawing from above. We glue the parts together. 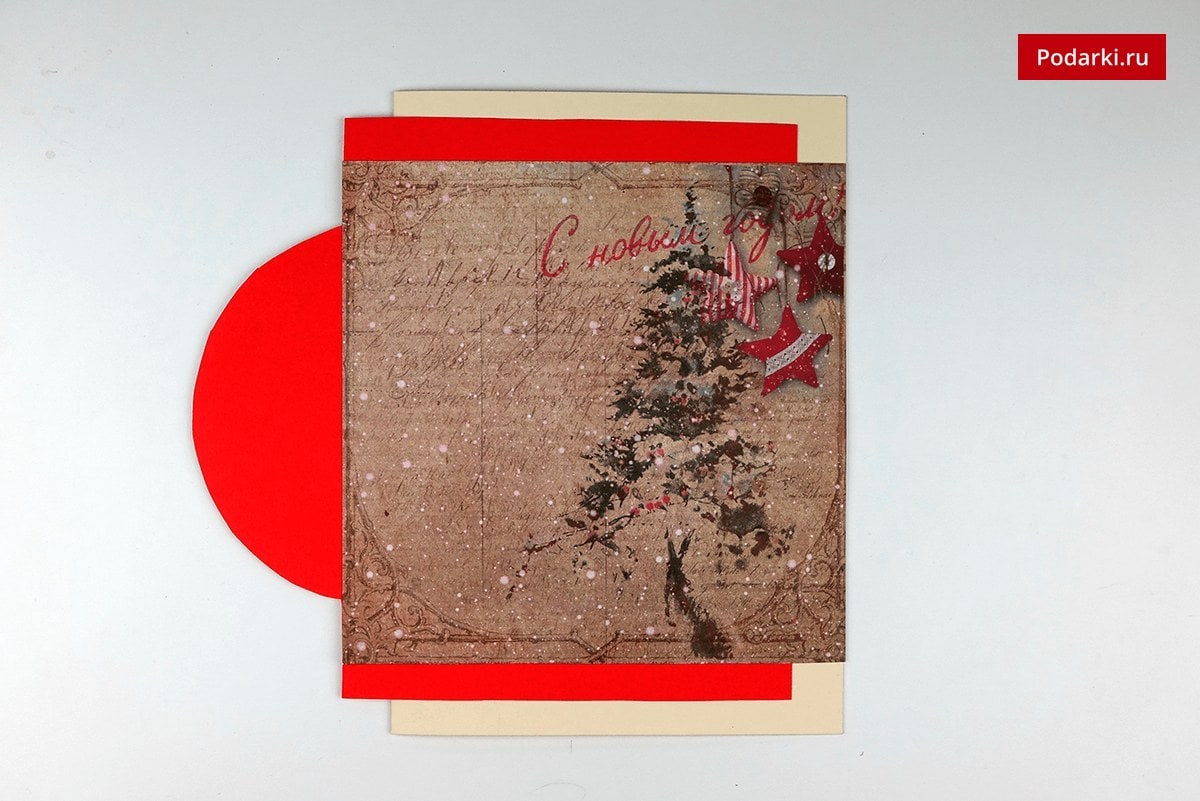
Glue the lace ribbon on top of the New Year's pattern and below. For this we use two types of tape. 

We do this in such a way that the tape is on the back of the card. 

From a napkin with New Year's pattern, cut out the green decor. For example, twigs with cones or berries. 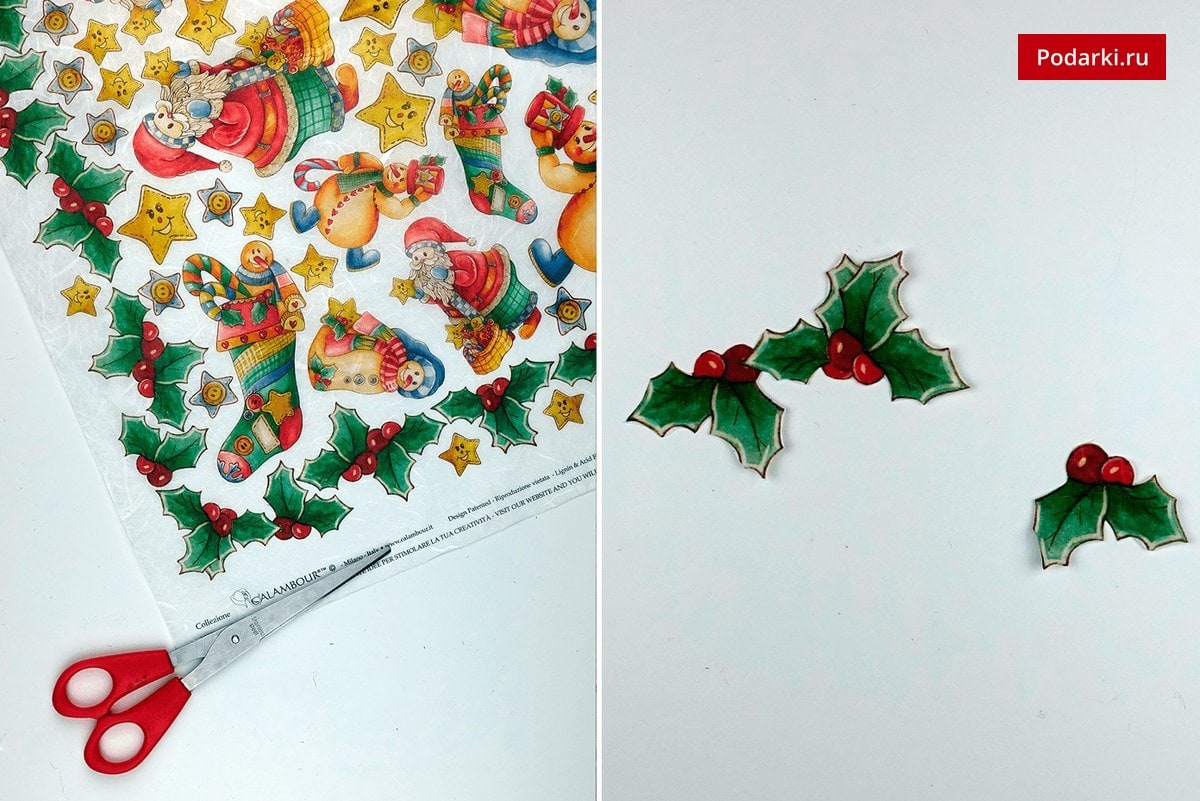
On the round part of the postcard we place a lace ribbon and a piece of burlap or canvas. On top we attach a green decor from a napkin. 
In random order we place pieces of twine. From a red satin ribbon we make a bow and attach it on top. If desired, you can decorate the card with additional decorative elements. 

The last element is a flat wooden Christmas tree toy. Inside the eyelet we thread the string and tie it to a knot. We put the toy inside or attach it outside. 

It remains only to sign the card and give it to a loved one. 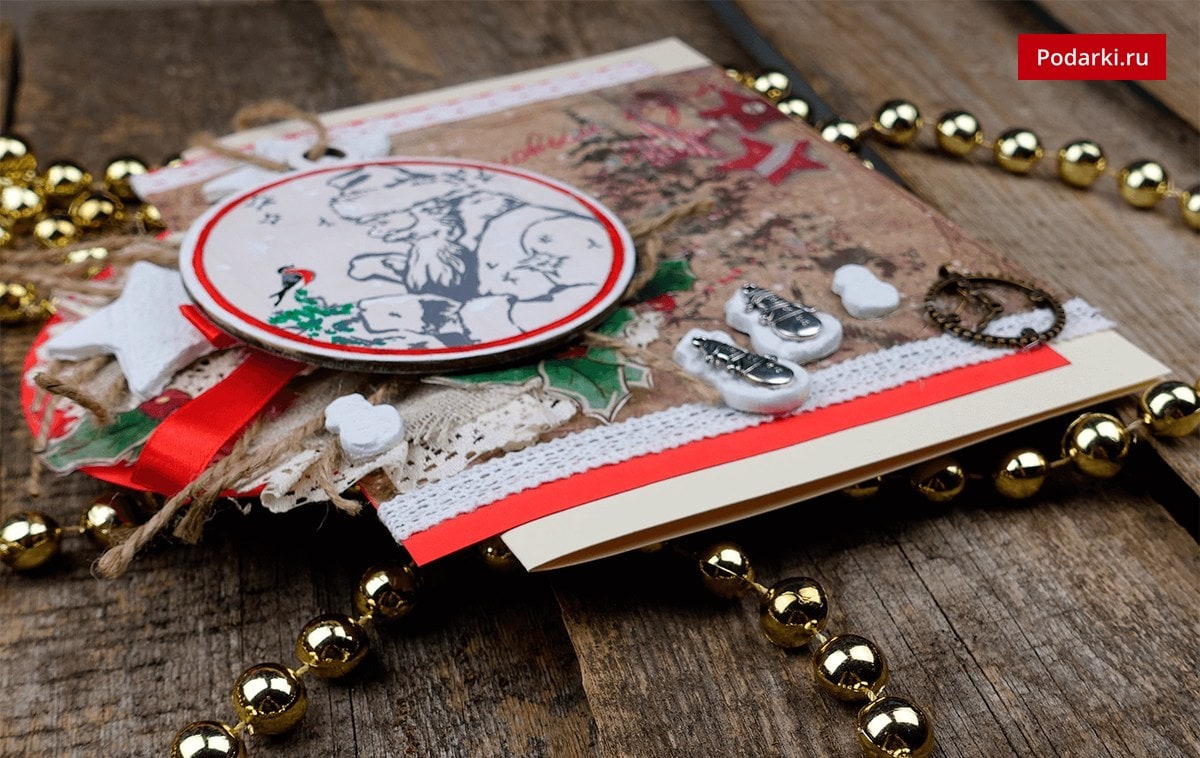
Volumetric postcard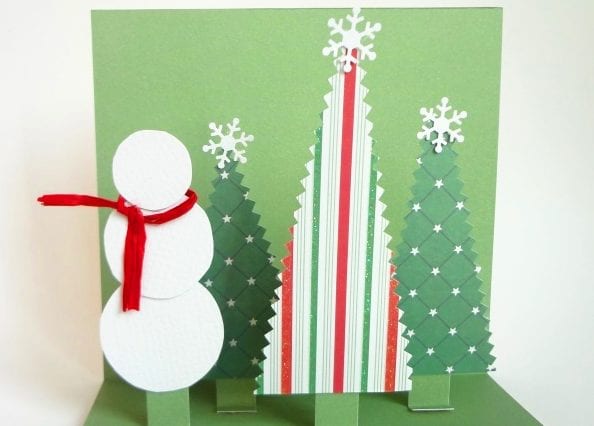
In the process of creating a postcard, we need the following:
- cardboard or heavy paper;
- green and white cardboard;
- white paper;
- scissors;
- ribbon;
- glue;
- hole puncher.

We make a wide base for postcards from thick paper or cardboard. Cut thin strips and bend them in half.
We bend the ends of the strips in different directions and glue them to the card, as shown in the photo.
From white cardboard we cut out three circles of different sizes. We glue them together with an overlap.
Cut three Christmas trees and snowflakes.
Gently glue the Christmas trees and the snowman to the stripes that were pasted earlier. Decorate the Christmas trees from above with snowflakes.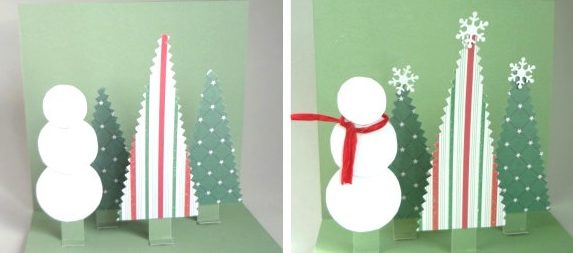
We tie a bright ribbon around the snowman’s neck. The original, voluminous postcard is ready!
Unusual card for the New Year 2018
Even a beginner can make such a card. She does not need special knowledge or too expensive materials. If desired, some parts can be replaced.

Prepare:
- scrapbooking paper;
- thick cardboard or paper;
- a pen;
- beads or large rhinestones;
- glue;
- scissors.
First, bend the paper in half to create the base. Determine the size of the tree, based on the size of the base.

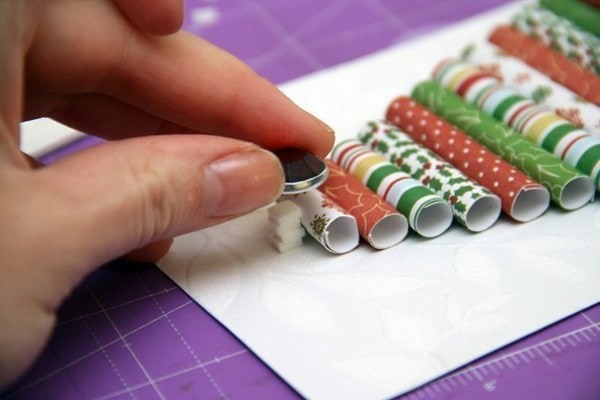
From scrapbooking paper, cut out several rectangles of different widths. We take the pen and one by one we wind pieces of paper on it. So that they do not return to their original position, glue the ends together.
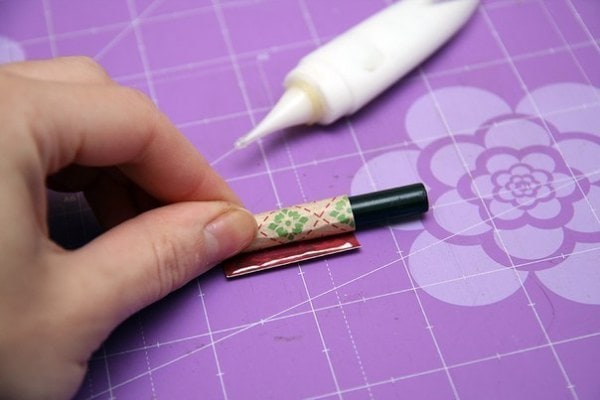
Gently glue the tubes together. Leave them until completely dry.
We glue the finished Christmas tree to the base of the card.
Glue a rhinestone or bead to the top of the tree.
If desired, you can add a few more of these elements as decor.
Fragrant card

We will need the following set of materials:
- kraft paper;
- thick cardboard;
- green sisal;
- brown paper;
- scrapbooking paper;
- canvas;
- scissors;
- twine;
- fiber;
- cinnamon sticks;
- lace tape;
- pencil;
- glue in the gun;
- ruler.

From thick white cardboard, cut two rectangles of the same size. 
We lay out two rectangles with a small distance on a sheet of kraft paper. 
Fold the paper in half, as shown in the photo. 
Glue the second sheet of kraft paper on top. Thus, a blank for the card is obtained, which is sealed with cardboard from the inside. 
The excess part of the craft paper is carefully cut. 

From scrapbooking paper, cut out a rectangle, slightly smaller in size than the base of the card.

Glue the paper background onto the base. 
Cut another brown paper rectangle. Glue it on the background of the card. 
From a small section of burlap, we stretch several threads on the sides. This is necessary in order to create a light effect of negligence. Glue the flap on top of the cardboard. 
Add a piece of lace ribbon to the composition and glue it. 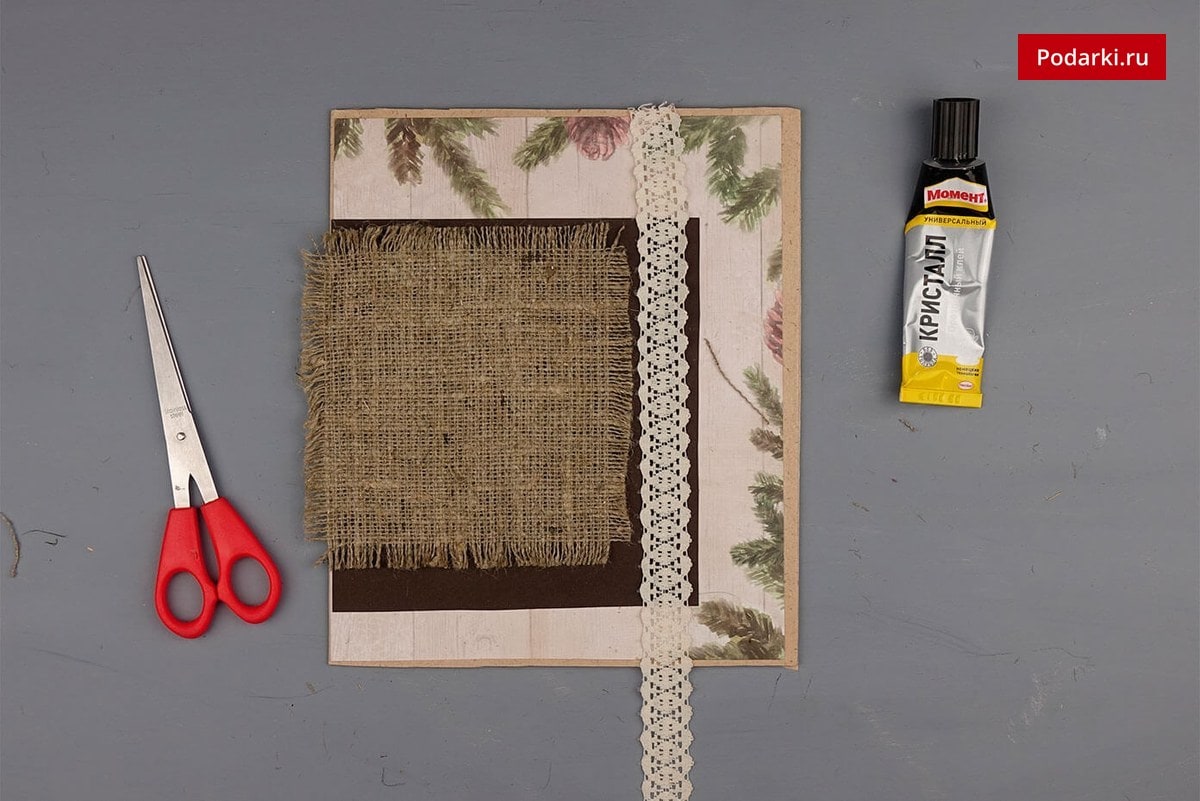
From green sisal cut a rectangle and an oval. 

We collect the fiber in the shape of a ring. 
Glue the sisal to the burlap, and on top we attach the prepared ring. 
We draw a small deer on white paper or print a template on a printer. Then carefully cut it out. 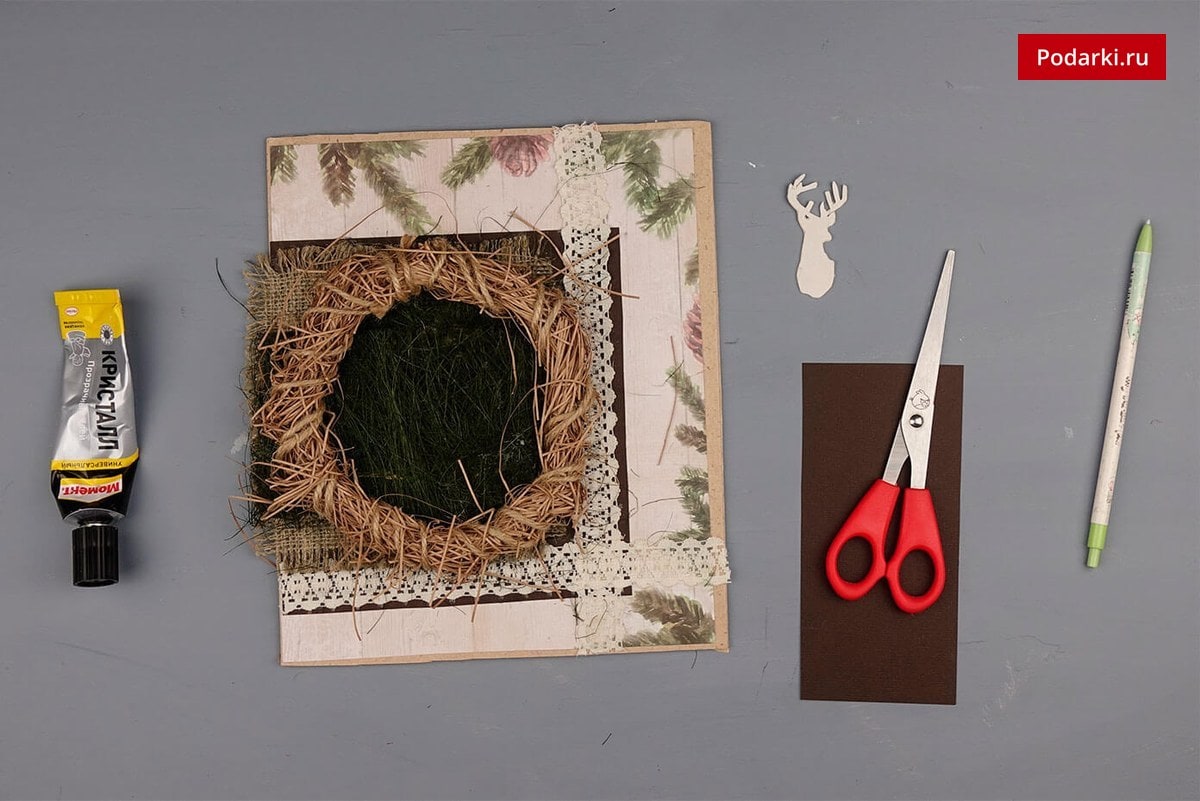
From the brown paper we cut an oval and glue a deer to it. 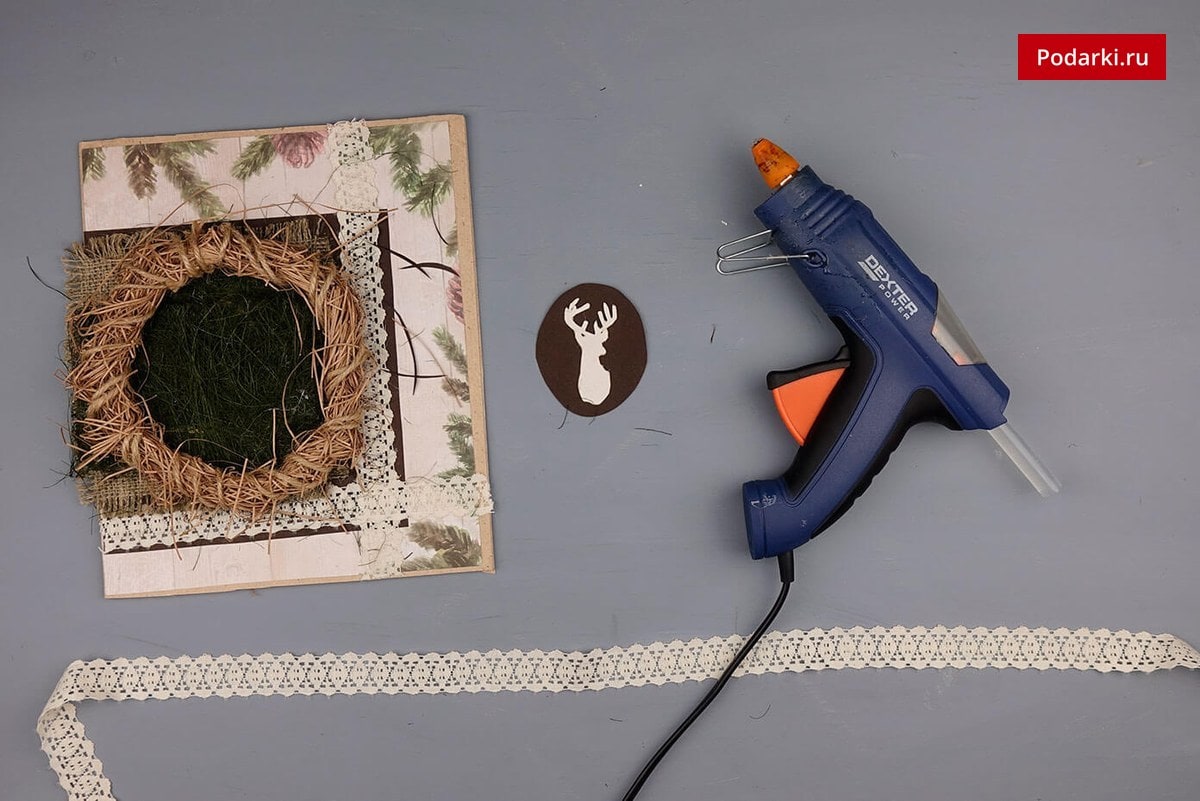
Decorate the oval with a lace ribbon and glue it on the back. 
Glue the composition to the center of the postcard. 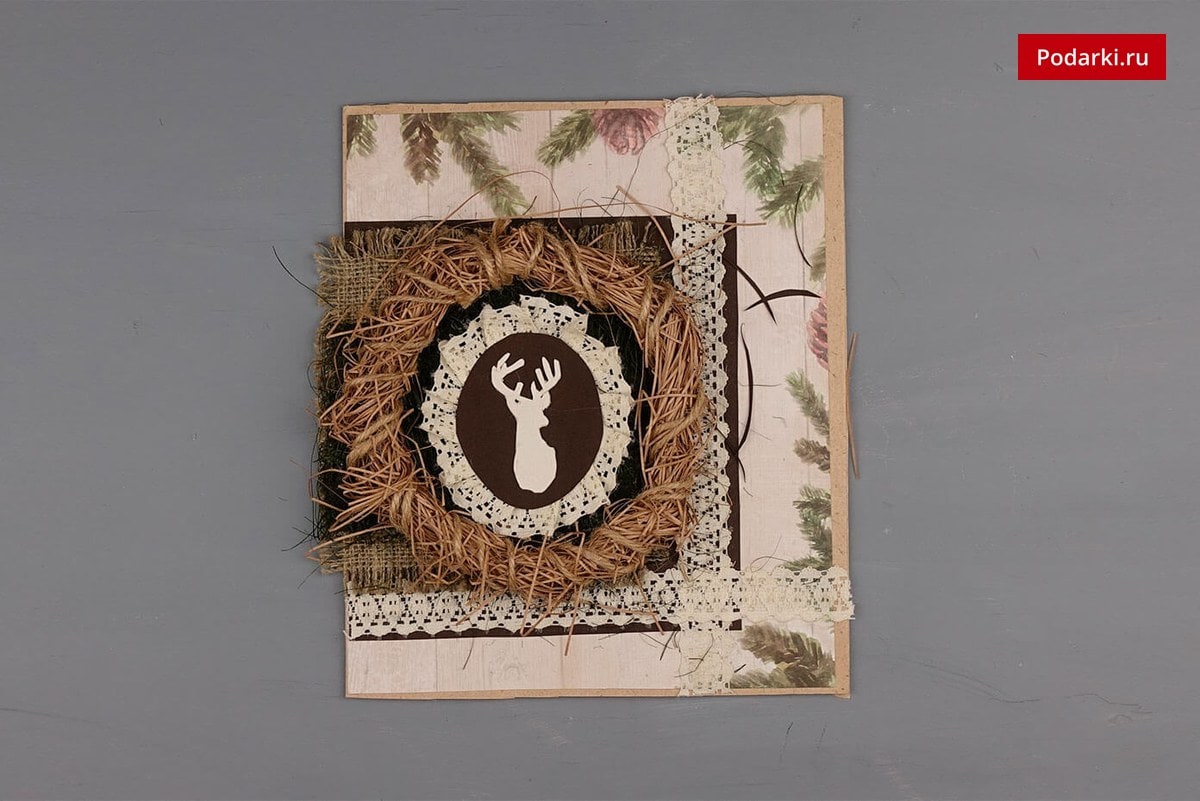
We bind together two cinnamon sticks with twine. Glue a small bow from a strip of canvas to the card. 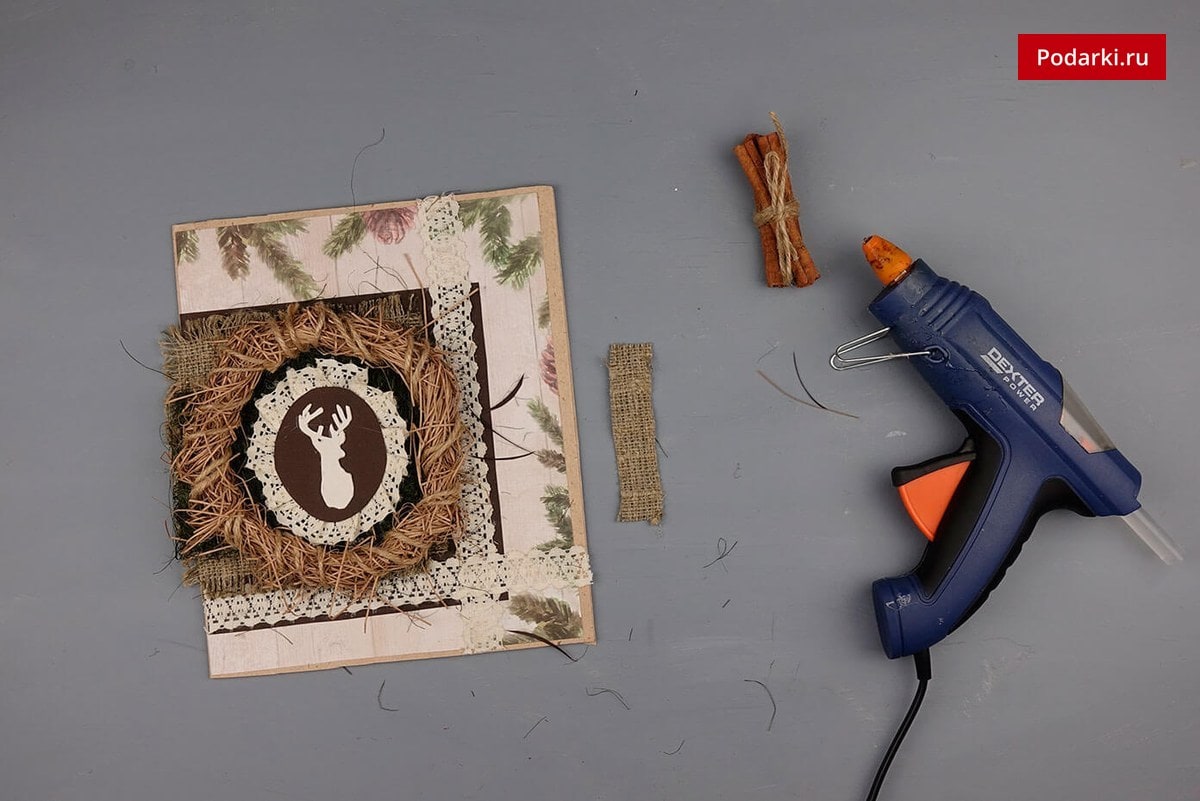
The original, voluminous and fragrant card is ready! 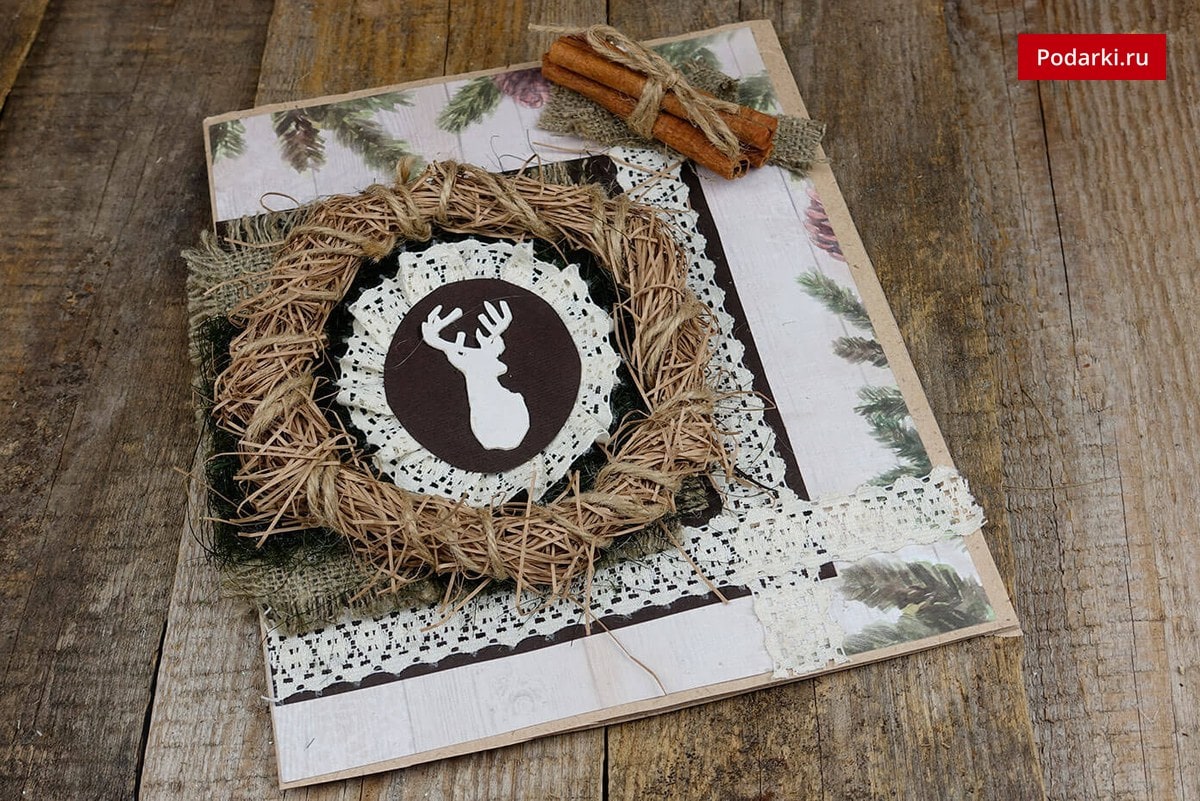 Postcards for the New Year 2018: interesting ideas


As you can see, making a card is really not difficult. Therefore, purchase the necessary materials and be sure to try to implement at least one of the ideas presented. Share photos of your postcards in the comments.
")


To answer
Want to join the discussion?Feel free to contribute!